

How to Keep Pantry Labels from Peeling Off for Good
Last Updated: November 8, 2026
Quick Summary
To keep pantry labels from peeling off, clean each jar with dish soap, rinse, wipe the label area with isopropyl rubbing alcohol on a lint-free cloth, and let it air dry completely. Use a permanent, waterproof adhesive rated for glass or plastic, press the edges firmly, and let it cure 24 hours before washing or chilling.
- Sticking a label on a still-damp jar is the most common reason labels fail.
- Permanent pressure-sensitive adhesive suits long-term jars; removable stickers are for temporary batch labels.
- Vinyl is the durable pick for fridge and freezer items because it flexes with temperature changes.
- Most adhesives reach full strength within 24 hours, so wait a day before the first wash.
- Test one label on a spare container of the same material before labeling a whole pantry.
Table of Contents
- Why Pantry Labels Peel and Fail to Stick
- How to Clean Jars Before Labeling
- Choosing the Best Adhesive for Pantry Labels
- Waterproof Pantry Labels and Material Comparison
- How to Seal Vinyl Labels on Jars
- Application Technique and Curing Time
- Troubleshooting Labels by Failure Cause
- Stocking Up on Reliable Pantry Labels at Velo Shop X
- Frequently Asked Questions
Why Pantry Labels Peel and Fail to Stick
Peeling pantry labels almost always come down to four things: a dirty surface, the wrong adhesive, moisture, or poor application. Fix those and most labels stay put for years. This guide walks through each cause and its fix.
A lifting corner means the label is fighting a surface it was never meant to grip. Glass and plastic are non-porous, so oil, dust, or condensation becomes a barrier between sticker and jar.
That's why a container that looks clean can still reject a label: a dry cloth pushes dust around but leaves the invisible film of cooking oil that kills adhesion.
The Four Causes of Edge Lift
Edge lift is the technical term for what you see when a corner or rim of a label curls away from the surface. It has four main triggers:
- Surface contamination: oil, dust, or soap residue from washing
- Wrong adhesive strength: a removable sticker used on a long-term storage jar
- Moisture: condensation from the fridge, dishwasher, or steamy kitchen
Watch out: sticking a label on a still-damp jar is the most common reason labels fail. Trapped water turns to vapor and pushes the edges up.
How to Clean Jars Before Labeling
Cleaning decides whether your pantry labels last weeks or years. The goal is zero oil, dust, or residue so the adhesive makes full contact.
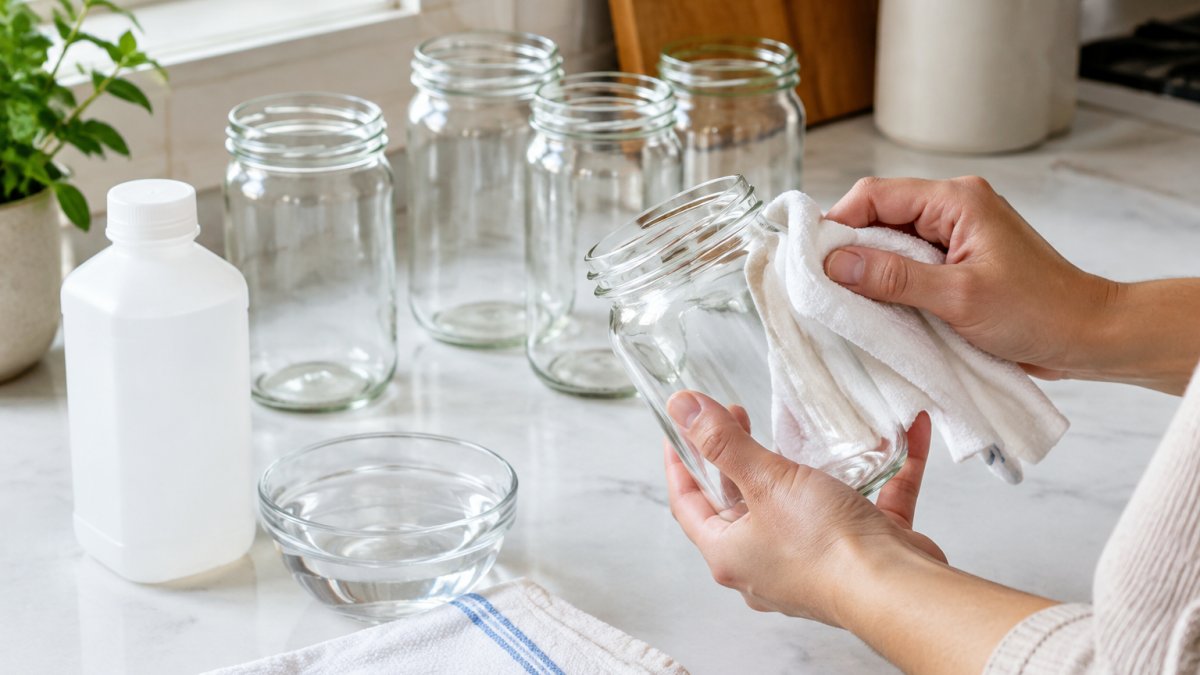
- Remove the old label and glue. Soak the jar in warm soapy water for a few minutes, then scrape gently with a plastic scraper. Never use a metal blade on glass or plastic.
- Wash with dish soap. Hot water and a drop of grease-cutting soap strip off food oils.
- Rinse thoroughly. Soap residue is a hidden adhesion killer.
- Wipe with rubbing alcohol. This is the step most people skip, and it's the one that matters most.
- Let it air dry completely. More on this in a moment.
Rubbing Alcohol, Dust and Residue Removal
Isopropyl rubbing alcohol is a common final wipe for glass and hard plastic. It dissolves the thin oil layer soap can leave behind and evaporates fast, adding no moisture.
- Pour a little alcohol onto a clean, lint-free cloth, not directly into the jar.
- Wipe the whole label area, not just the center.
- Let it flash off for a minute before applying.
Dust is the sneaky one: a jar on a shelf collects a fine layer of flour or sugar you can't see but the adhesive can feel.
If you're setting up a whole pantry at once, our guide on how to organize charging cables at home and work covers the same prep-first mindset for small items and drawers.
Choosing the Best Adhesive for Pantry Labels
Permanent, pressure-sensitive adhesives designed for glass and plastic are commonly used for pantry labels, while removable craft stickers are built to lift cleanly.
Adhesive strength matters more than most people realize. Removable adhesives are built to lift cleanly, exactly what you don't want on a jar you'll refill for years.
- Permanent adhesive: best for long-term storage jars, canisters, and spice jars you refill
- Removable adhesive: best for temporary batch labels or seasonal items
- Waterproof adhesive: best for anything that gets wiped down or chilled
A common mistake is grabbing whatever label sheet is in the drawer. Check the packaging for the words "permanent" and "waterproof" before you commit.
Waterproof Pantry Labels and Material Comparison
Waterproof pantry labels resist moisture, wiping, and temperature swings. Material matters as much as adhesive: paper and vinyl behave very differently, and the same material can perform well on glass and poorly on textured plastic.
Here's how the four common options stack up:
| Material | Water Resistance | Best For | Watch Out For |
|---|---|---|---|
| Paper labels | Low | Dry shelves, short-term use | Wrinkles and lifts near steam |
| Plastic labels | Medium | Everyday pantry jars | Can curl at edges over time |
| Vinyl labels | High | Fridge and freezer items | Needs firm pressure to bond |
| Laminated tape | High | Wipe-clean and washable jars | Bulkier feel on small lids |
Paper vs Plastic vs Vinyl vs Laminated Tape
Paper labels are the budget option and the first to fail in a kitchen. They absorb moisture, wrinkle, and lift at the edges fast.
Plastic labels handle light moisture and suit everyday pantry jars. Vinyl is the durable pick for fridge or freezer items because it flexes with temperature changes instead of cracking.
For a pantry that gets real use, vinyl or laminated tape may be worth considering despite a higher upfront cost.
Matching Material and Adhesive to the Container Surface
The surface under the label decides which material and adhesive will hold. A label that grips glass perfectly can slide off a textured plastic canister or fail on a painted metal tin.
- Glass jars and bottles: Smooth and non-porous, glass is the easiest surface for permanent pressure-sensitive adhesive. Vinyl and laminated tape bond well, but glass shows oil and dust clearly, so the alcohol wipe matters most here. Avoid removable adhesive unless the label is temporary.
- Hard plastic canisters: Smooth polypropylene and polyethylene are low-surface-energy plastics that resist many adhesives, so choose a permanent adhesive explicitly rated for plastic. If the canister flexes, vinyl beats paper because it moves with the container instead of cracking.
- Metal tins and canisters: Metal holds adhesive well once degreased, but painted or powder-coated tins can have a slightly textured finish. Press firmly and expect a longer cure time. Avoid abrasive cleaning on painted metal before labeling.
A common mistake is grabbing whatever label sheet is in the drawer. Check the packaging for the words "permanent" and "waterproof" before you commit. If a label doesn't say waterproof, assume it isn't.
How Labels Perform Through Washing and Temperature Changes
Pantry labels meet handwashing, dishwasher cycles, fridge condensation, humidity, and temperature swings between a hot kitchen and a cold fridge. Material choice determines which of these a label survives.
- Handwashing: Laminated tape and vinyl handle a quick handwash best. Paper labels should never be handwashed; water wicks under the edge and lifts the print.
- Dishwasher: Most consumer label adhesives aren't designed for repeated dishwasher cycles. If a container goes in the dishwasher, use laminated tape or a label rated for dishwashing, and expect a shorter lifespan than handwashing.
- Refrigeration and freezing: Vinyl flexes with cold temperatures and resists condensation better than paper or stiff plastic. Let chilled containers reach room temperature before wiping the label, so you don't trap moisture under the edge.
If you're setting up a whole pantry at once, our guide on how to organize charging cables at home and work covers the same prep-first mindset for small items and drawers.
How to Seal Vinyl Labels on Jars
Sealing vinyl labels on jars means making sure the full adhesive surface has bonded, then protecting the edges from lifting. Vinyl is tough, but it only performs if applied correctly.
- Apply the vinyl label to a clean, fully dry surface.
- Press from the center outward with your thumb or a soft cloth.
- Run a fingernail or the edge of a credit card firmly around the entire border.
- For extra hold on high-moisture jars, add a strip of clear laminated tape over the label edge.
The edge is where failure starts. A firm border press pushes out trapped air and forces the adhesive into full contact. Skip it and you've left a pocket for moisture to creep in.
Application Technique and Curing Time
Application technique and curing time determine whether a label bonds for good. Most adhesives reach full strength within 24 hours, so avoid washing or chilling a freshly labeled jar for at least a day.
- Apply at room temperature. Cold glass stops adhesive from flowing and bonding.
- Work from one edge. Lay the label down smoothly instead of dropping it flat and trapping air.
- Smooth out bubbles immediately. Once adhesive sets, trapped air stays trapped.
If you're organizing a small pantry or apartment kitchen, our beginner's guide to practical home organization for small rooms covers layout and storage ideas that pair well with a labeling system.
Troubleshooting Labels by Failure Cause
When pantry labels fail, the failure pattern tells you what went wrong. Match symptom to cause and fix the actual problem instead of starting over blindly, this saves money because you stop buying new labels every time one lifts.
Step 1: Identify the Failure Pattern
- Corners curl up while the center stays flat: usually surface contamination or insufficient edge pressure.
- The whole label slides or drops off: usually the wrong adhesive for the surface or a removable adhesive on a long-term jar.
- Bubbles or wrinkles under the label: application error, trapped air, or a label applied to a curved surface without smoothing from the center out.
Step 2: Fix by Cause
Residue and oil contamination. If corners curl but the center holds, oil or dust is the likely barrier.
Moisture and condensation. If labels lift in the fridge or after washing, switch to vinyl or laminated tape and dry the container fully before applying.
Incompatible adhesive. If a label slides off a smooth jar, the adhesive is probably removable or not rated for that surface.
Handling and abrasion. If edges lift where hands grip the jar, friction is peeling the label back.
Step 3: Safe Ways to Improve Adhesion Without Damaging Containers
- Low-risk: a firm edge press, a clean alcohol wipe, a longer cure time, and a strip of clear tape over the edge.
- Use with care: gentle warming of the label with a hair dryer on low can soften adhesive, but too much heat can warp plastic or damage printed designs.
- Avoid: strong solvents, acetone, or abrasive pads on plastic, painted metal, or printed labels. These can cloud plastic, strip finishes, or smear print, and they rarely fix the underlying adhesion problem.
Step 4: Run a Simple Adhesion Test
Before committing to a whole pantry, test one label on a spare container of the same material: press the edges firmly, wait 24 hours, check for edge lift, run a handwash cycle, and check again. A label that survives with flat edges is right for that container, faster and cheaper than relabeling a full pantry twice.
For a deeper look at picking organizers that hold up over time, see our guide on how to choose durable home organizers.
Stocking Up on Reliable Pantry Labels at Velo Shop X
At Velo Shop X, we curate home goods, kitchen essentials, and organization tools, offered at competitive prices.
- Waterproof vinyl and laminated label options for fridge and freezer jars
A well-labeled pantry isn't about perfection. It's about picking the right materials, prepping the surface, and applying with care.
Ready to stop relabeling the same jars? Browse our home organization range at Velo Shop X and find waterproof labels and pantry essentials built to last.
Frequently Asked Questions
What is the best adhesive for pantry labels on glass?
A permanent adhesive made for glass and plastic is commonly used on pantry jars. Permanent adhesives are generally more resistant to moisture than basic paper-label glue, which can soften near steam. Look for labels sold as permanent or waterproof, and press them down firmly for 30 seconds so the adhesive fully contacts the surface. Removable adhesives are easier to swap but lift sooner on curved glass.
Does cleaning the surface help labels stick better?
Yes. Dust, oil and condensation are the main reasons pantry labels peel. Wash jars, let them dry completely, then wipe the label area with rubbing alcohol and allow it to evaporate. A clean, dry surface lets the adhesive bond fully instead of sitting on a film of residue, which is why prep matters as much as the label material itself.
How do I keep labels from peeling on curved surfaces?
Use a smaller label or a flexible vinyl material that bends with the jar. Apply from the center outward, pressing out air bubbles as you go, and smooth the edges down firmly. Flat rigid labels fight the curve and lift at the corners. Letting the label cure for 24 hours before washing the jar also helps the adhesive set.
How can I prevent stickers from peeling off over time?
Choose waterproof or laminated labels, prep the surface with alcohol, and seal vinyl labels with a clear top coat. Store jars away from direct steam and avoid soaking labeled containers in hot water. Re-press edges after washing and replace any label showing edge lift early, before the whole sticker comes loose.
